Wood Floor Sanding and Staining: A Comprehensive Guide
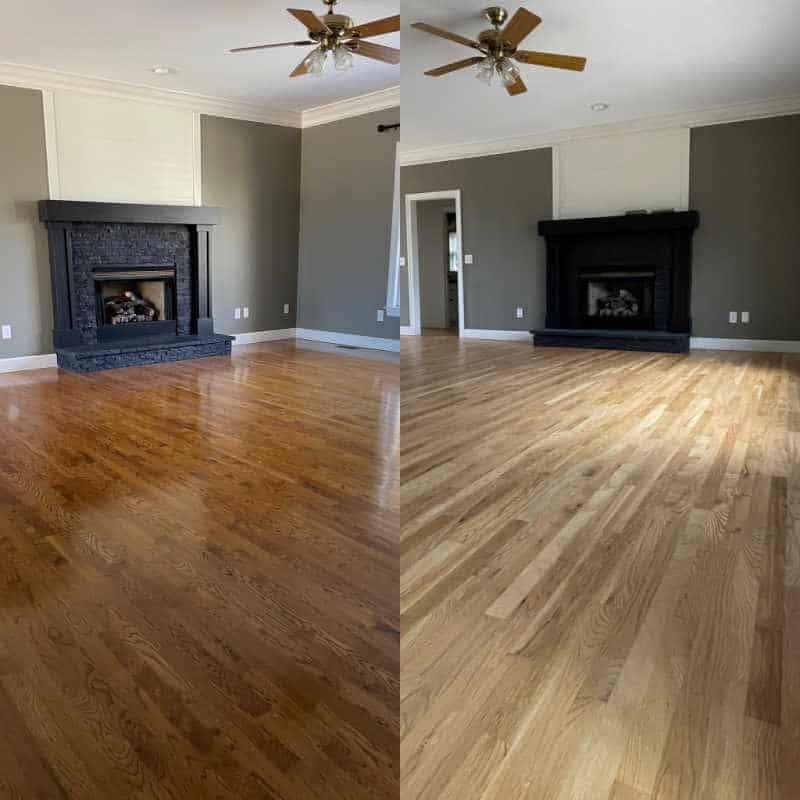
Wood floors are a timeless and elegant addition to any home, but over time, they can become scratched, dull, and discolored. Wood floor sanding and staining is a process that can revitalize your floors, restoring their beauty and extending their lifespan. This comprehensive guide will delve into the essential aspects of wood floor sanding and staining, providing valuable information for homeowners and DIY enthusiasts.
Understanding the Process
Wood floor sanding involves removing the top layer of wood using a specialized sanding machine. This process eliminates scratches, dents, and other imperfections, revealing the beautiful, natural grain beneath. After sanding, the floor is ready for staining, which adds color and depth to the wood. Staining can enhance the natural wood tones or create a completely new look.
Key Stages of Wood Floor Sanding and Staining
The process of sanding and staining wood floors involves several key stages:
1. Preparation
Before sanding, it's essential to prepare the area. This includes removing furniture, covering surrounding areas, and protecting moldings and baseboards with masking tape. Any nails or staples protruding from the floor should be pounded down or removed. Loose floorboards should be secured with adhesive or screws.
2. Sanding
Sanding is carried out in multiple stages, using progressively finer grits of sandpaper. The initial coarse grit removes the top layer of wood and imperfections, followed by finer grits to smooth out the surface. This gradual process creates a consistent and even finish.
3. Staining
After sanding, the floor must be cleaned thoroughly to remove dust and debris. The stain is then applied using a brush, roller, or pad. The type of stain depends on the desired look and the species of wood. Water-based stains are easier to clean up but may not penetrate as deeply as oil-based stains.
4. Finishing
The final stage involves applying a sealer or finish to protect the stained wood. Polyurethane is a popular choice, providing durability and a glossy finish. Other options include wax and oil-based finishes. The type of finish should be chosen based on the desired level of protection and sheen.
Crucial Factors to Consider
Several factors should be taken into account when planning wood floor sanding and staining:
1. Wood Species
The type of wood determines the sanding and staining process. Some woods, like oak, are harder and more durable, requiring more aggressive sanding. Others, like pine, are softer and more susceptible to damage.
2. Existing Finish
If the floor has an existing finish, it will need to be removed before sanding. This can be done using a chemical stripper or a mechanical sander with a stripping disc.
3. Desired Look
The desired look will influence the choice of stain and finish. Lighter stains enhance the natural wood tones, while darker stains create a more dramatic look. The sheen of the finish can range from matte to gloss, depending on personal preference.
Professional or DIY?
Wood floor sanding and staining can be a challenging task, requiring specialized equipment and expertise. For homeowners considering DIY, proper preparation and careful execution are critical. However, if unsure or tackling a large project, hiring a professional contractor is highly recommended. Professionals have the experience and knowledge to ensure the job is done correctly, resulting in a beautiful and durable finish.

Refinishing Hardwood Floors With Pet Stains Options For Fixing

Ron The Floor Guy Wood Sand Stain And Refinish For Hardwood Floors In Nj

Hardwood Floor Refinishing Restoration N Hance Wood

Hardwood Floor Refinishing And Everything You Need To Know At Home With The Barkers

How To Refinish Hardwood Floors

How To Stain Wood Floor Sanding Co

Refinishing Our Hardwood Floors Before After Young House Love

Floor Refinishing Services N Hance

How To Sand Refinish Hardwood Floors Youtube

How Long Does It Take To Refinish Hardwood Floors Refinishing Guide Reallyfloors America S Est Flooring
See Also


