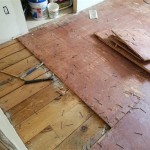
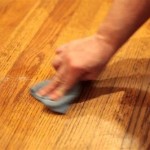
Sanding Wood Floors By Hand
Sanding wood floors by hand is a formidable task but also an accessible and rewarding way to restore the beauty of your hardwood floors. While it's more labor-intensive than using a power sander, hand sanding provides greater control over the process, enabling you to achieve a more refined finish and protect the integrity of your floor.
Before embarking on this project, it's crucial to assess the condition of your floor to determine if hand sanding is the most suitable method. For floors with minor scratches or surface damage, hand sanding can effectively remove these imperfections. However, if your floor has deep gouges or significant damage, it may be necessary to consider power sanding or professional refinishing services.
To prepare for hand sanding, gather the necessary tools and materials, including sandpaper (various grits), a sanding block, a dust mask, safety glasses, and a vacuum cleaner. Choose sandpaper with progressively finer grits, starting with 60-grit for removing deep scratches and progressing to 120-grit and 220-grit for smoothing the surface. A sanding block provides a stable and even surface for the sandpaper, ensuring consistent sanding.
Before sanding, clear the floor of all furniture, rugs, and debris. Sweep and vacuum the floor thoroughly to remove any dust or particles that could interfere with the sanding process. Wear a dust mask and safety glasses to protect yourself from inhaling harmful dust and debris.
Begin sanding with the coarsest grit sandpaper (60-grit) by attaching it to the sanding block. Sand in the direction of the wood grain, applying even pressure and overlapping your strokes to avoid leaving any un-sanded areas. Gradually move to finer grits (120-grit and 220-grit) as you progress, sanding with each grit until the desired smoothness is achieved.
In areas with intricate details or corners, where a sanding block may not reach, use a sanding sponge or a folded piece of sandpaper to manually sand these areas. Be extra cautious while sanding near baseboards, moldings, or other delicate features to avoid damaging them.
As you sand, regularly vacuum the floor to remove dust and debris. Inspect the floor closely for any remaining scratches or unevenness. If necessary, repeat the sanding process with the appropriate grit sandpaper to achieve the desired results.
Upon completion of the sanding process, vacuum the floor thoroughly to remove all dust and debris. Use a tack cloth to wipe down the floor and remove any lingering dust particles that may interfere with the application of the finish.
After hand sanding, your wood floor will be ready for the application of a suitable finish, such as stain, polyurethane, or oil. Allow the finish to dry and cure according to the manufacturer's instructions before walking on or placing furniture on the floor.

The Basics Of Hand Sanding Floors Mr Sander

The Basics Of Hand Sanding Floors Mr Sander

Hand Sanding For Refinishing Old Wood Floors Mr Sander

How To Use Hand Sanding Blocks For Floor Mr Sander

The Whispers Of Wood A Journey Into Types And Techniques Floor Sanding Floors

The Benefits Of Hand Sanding Wood Floors Mr Sander

Refinishing An Old Wood Floor With Only A Belt Sander And Hand

Best Practices For Sanding And Refinishing Small Spaces Wood Floors

Hand Sanding Techniques For Hard To Reach Areas Mr Sander

The Benefits Of Hand Sanding Wood Floors Mr Sander
See Also


