Sanding And Finishing Wood Floors
Sanding and finishing wood floors is a rewarding project that can add beauty and value to your home. However, it's important to do it right to ensure the best possible results. Here's a step-by-step guide to help you sand and finish your wood floors like a pro:
Step 1: Preparation
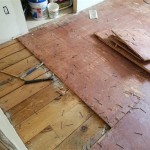
Before you start sanding, it's important to prepare the floor. This includes removing all furniture, cleaning the floor thoroughly, and repairing any damaged areas. If the floor is particularly dirty or has a lot of built-up wax, you may need to use a floor stripper to remove it before sanding.
Step 2: Choose the Right Sandpaper
The type of sandpaper you use will depend on the condition of the floor. For a light sanding, you can use a fine-grit sandpaper (120-150 grit). For a more aggressive sanding, you can use a medium-grit sandpaper (80-100 grit). If the floor is in very bad condition, you may need to use a coarse-grit sandpaper (60-80 grit).
Step 3: Sand the Floor
Once you have chosen the right sandpaper, it's time to start sanding the floor. Start by sanding in the direction of the wood grain. If you sand against the grain, you could damage the floor. Be sure to overlap your strokes to avoid leaving any bare spots. As you sand, gradually move to finer-grit sandpaper to achieve a smooth finish.
Step 4: Clean the Floor
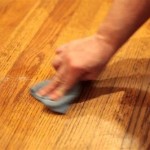
Once you have sanded the floor, it's important to clean it thoroughly. This will remove any dust or debris that could interfere with the finish. You can use a vacuum cleaner or a damp mop to clean the floor.
Step 5: Apply the Stain
If you want to change the color of the floor, you can apply a stain. Stain is available in a variety of colors, so you can choose one that matches your décor. Apply the stain evenly to the floor using a brush or a rag. Be sure to follow the manufacturer's instructions for drying time.
Step 6: Apply the Finish
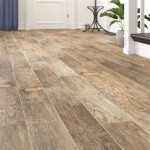
The final step is to apply the finish. The type of finish you choose will depend on the desired look and durability. There are three main types of finishes: polyurethane, oil-based, and water-based. Polyurethane is the most durable finish, but it can also be the most difficult to apply. Oil-based finishes are less durable than polyurethane, but they are easier to apply and give a more natural look. Water-based finishes are the least durable, but they are also the easiest to apply and have the lowest VOCs (volatile organic compounds).
Step 7: Maintenance
Once you have finished the floor, it's important to maintain it properly to keep it looking its best. This includes sweeping or vacuuming the floor regularly and mopping as needed. You should also reapply the finish every few years to protect the floor from wear and tear.

Choosing The Right Finish For Your Newly Sanded Floors Sanding Wood

Easy Guide To Wood Floor Sanding Polishing Diy In 5 Steps

How To Refinish Hardwood Floors

How To Sand Hardwood Floors In 10 Easy Steps Mr Sander

Sanding Pine Floors Challenges And Solutions Wood

What Are The Essential Secrets On Floor Sanding And Finishing

Refinishing An Old Wood Floor With Only A Belt Sander And Hand

Wood Floor Sanding A Complete Overview Mr Sander

How To Sand Refinish Hardwood Floors

The Definitive Guide To Wood Stripping Sanding Mr Sander
See Also


