Installing Wood Floors On Stairs: A Step-by-Step Guide
Installing wood floors on stairs can significantly enhance the aesthetic appeal and value of a home. It's a project that requires careful planning, precision, and the right tools. This guide will walk you through the process, providing a step-by-step breakdown to help you achieve professional-looking results.
Preparing the Stairs
The first step is to prepare the stairs for the installation. This involves removing the existing carpet, padding, or other flooring materials. Be sure to remove any staples or nails that may interfere with the new floor installation. Once the surface is clear, inspect the stairs for any unevenness or damage. If needed, use a sander or wood filler to create a smooth and level surface for the wood flooring. Ensure the subfloor is in good condition, free from rot or moisture damage. If necessary, replace or repair any damaged sections.
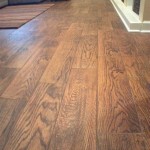
Choosing the Right Wood Flooring
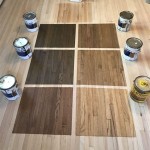
Selecting the right wood flooring for your stairs is crucial. Consider the style of your home and the desired aesthetic. Choosing a flooring type that complements the existing wood floors in other areas of the house is a common practice. Solid hardwood is a durable and classic option, while engineered wood is a more budget-friendly alternative. Consider the width and thickness of the planks, and opt for a species known for its durability and scratch resistance. You may also want to consider the wood's finish, whether it's pre-finished or unfinished. Pre-finished wood comes with a factory-applied finish that requires minimal maintenance. However, unfinished wood allows you to customize the color and sheen of the flooring to match your preferences.
Measuring and Cutting the Wood
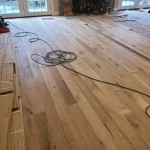
Accurate measuring and cutting are essential for a professional-looking installation. Start by measuring the width of each stair tread and riser. Then, cut the wood planks to the exact dimensions, taking into account the required spacing between the planks for expansion. Use a high-quality saw, such as a circular saw or a table saw, for precise cuts. Ensure that the cuts are straight and clean to minimize gaps and imperfections. It's recommended to practice on scrap pieces of wood before cutting the actual flooring planks to ensure you are comfortable with the process.
Installing the Wood Flooring
Once the planks are cut, you can begin the installation. Start at the bottom of the stairs and work your way up. Secure the first row of planks to the subfloor using nails or screws, depending on the type of flooring and your preference. Be sure to pre-drill holes for the nails or screws to prevent splitting the wood. When installing the planks, leave a small gap for expansion, typically around ⅛ inch. This will allow the wood to move freely with temperature changes. As you move up the stairs, ensure that the planks are aligned and butted together tightly. Use a rubber mallet to tap the planks into place and create a seamless finish. Remember to use a stair nosing on the edge of the treads to protect the flooring and provide a smooth transition to the landing.
Finishing Touches
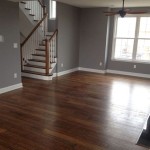
Once all the wood planks are installed, you need to finish the flooring. If you've chosen pre-finished wood, you can simply apply a sealant or polish to protect the finish. If you've chosen unfinished wood, you will need to sand the floor, stain it to your desired color, and apply a polyurethane finish for protection. After the finish has dried, you can then install the handrail and balusters.
Safety Tips
Safety is paramount during the installation process. Here are a few tips to keep in mind:
- Wear safety glasses and gloves to protect your eyes and hands.
- Use a ladder or scaffolding to reach the higher steps safely.
- Be mindful of the weight of the wood planks and move them carefully.
- If you're using power tools, unplug them when not in use.
Key Considerations
Installing wood floors on stairs involves several factors to consider:
1. Subfloor Condition:
Ensure a solid and level subfloor to prevent warping of the wood flooring. If necessary, repair any damaged sections or add additional support beams.
2. Moisture Control:
Wood flooring is susceptible to moisture damage. Ensure proper ventilation and moisture control measures are in place to prevent problems.
3. Professional Assistance:
If you're not comfortable undertaking this project on your own, consider hiring a professional installer. They have the expertise and experience to ensure a successful and long-lasting installation.

Hardwood Stair Installation Pro Floors Twin Cities

How To Install Wood Flooring On Stairs Esb

You Want To Install Hardwood On Stairs Reallyfloors America S Est Flooring

How To Install Hardwood Flooring On Stairs Builddirect

Hardwood Flooring On Stairs Elevate Your Home S Style Simple

How To Install Laminate Flooring On Staircase Step By Guide

How To Install Laminate Flooring On Stairs Direct Wood

How To Install Laminate On Stairs Step By For Beginners

How To Install Wood Flooring On Stairs Esb

How To Install Glue Down Hardwood Floor Fixing Stairs Diy