Install Tile Floor On Wood Subfloor
Installing tile flooring on a wood subfloor is a great way to update the look of your home. Tile is a durable and easy-to-clean material that can add value to your property. However, it is important to properly prepare the wood subfloor before installing tile, as improper preparation can lead to problems down the road.
The first step in preparing the wood subfloor for tile is to make sure that it is level and flat. Any uneven areas in the subfloor will need to be leveled out using a self-leveling compound. Once the subfloor is level, you will need to install a layer of backer board. Backer board is a thin, moisture-resistant material that provides a stable base for the tile.
Once the backer board is installed, you can begin installing the tile. Start by applying a layer of thin-set mortar to the backer board. Then, press the tile into the mortar and use a grout float to spread the mortar evenly. Once the tile is set, you can grout the joints between the tiles.
Installing tile on a wood subfloor is a relatively simple process, but it is important to take your time and do it right. By following these steps, you can ensure that your tile floor will last for many years to come.
Tools and Materials You'll Need
- Tile
- Backer board
- Thin-set mortar
- Grout
- Grout float
- Notched trowel
- Level
- Self-leveling compound (optional)
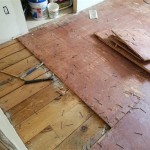
Step 1: Prepare the Wood Subfloor
The first step is to prepare the wood subfloor for tile. This involves making sure that the subfloor is level and flat. Any uneven areas in the subfloor will need to be leveled out using a self-leveling compound.
To level the subfloor, mix the self-leveling compound according to the manufacturer's instructions. Then, pour the compound onto the subfloor and use a trowel to spread it out evenly. Allow the compound to dry completely before proceeding.
Step 2: Install the Backer Board
Once the subfloor is level, you will need to install a layer of backer board. Backer board is a thin, moisture-resistant material that provides a stable base for the tile.
To install the backer board, first cut it to size. Then, apply a layer of thin-set mortar to the back of the backer board and press it into place on the subfloor. Use a level to make sure that the backer board is level, and then screw it into place.
Step 3: Install the Tile
Now that the backer board is installed, you can begin installing the tile. Start by applying a layer of thin-set mortar to the backer board. Then, press the tile into the mortar and use a grout float to spread the mortar evenly.
Once the tile is set, you can grout the joints between the tiles. To grout the joints, first mix the grout according to the manufacturer's instructions. Then, apply the grout to the joints using a grout float. Use a damp sponge to clean up any excess grout.
Step 4: Allow the Tile to Cure
Once the tile is installed, it is important to allow it to cure properly. This means keeping the tile dry and protected from traffic for at least 24 hours.
After 24 hours, the tile should be fully cured and ready to use.

How To Prepare A Subfloor For Tile Installation The Home

How To Prepare Subfloor For Tile The Home Youtube

How To Prepare A Subfloor For Tile Installation The Home

How To Prepare A Subfloor For Tile Installation The Home

Ceramic Tile Installation Tips Tricks Jenkins The Flooring People

How To Prepare Subfloor For Tile The Home

Blog Expert Advice How To Tile Onto Wood Plywood Or Chipboard

How To Lay Tile Diy Floor Installation Lowe S

Step By Installation Guide For Wood Floor Tiles

Waterproofing How Do I Correctly Install Ceramic Floor Tile Home Improvement Stack Exchange


