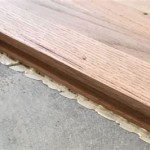
How To Lay Engineered Wood Flooring
Engineered wood flooring is a popular choice for homeowners who want the look and feel of hardwood flooring without the high cost or maintenance. It is made up of a top layer of real wood veneer that is bonded to a core of plywood or fiberboard. This makes it more stable and less likely to warp or buckle than solid hardwood flooring. Engineered wood flooring is also easier to install than solid hardwood flooring. Here are the steps on how to lay engineered wood flooring over concrete subfloor:
Tools and Materials You'll Need:
• Engineered wood flooring • Underlayment • Moisture barrier • Adhesive • Trowel • Circular saw • Miter saw • Drill • Nail gun • Nails • Hammer • Pencil • Tape measure
Step 1: Prepare the Subfloor
The first step is to prepare the subfloor. The subfloor must be level and smooth, and it must be free of any debris or dirt. If the subfloor is not level, you will need to level it using a self-leveling compound. If the subfloor is not smooth, you will need to sand it down until it is smooth. Once the subfloor is prepared, you can begin to install the underlayment.
Step 2: Install the Underlayment
The underlayment will help to protect the engineered wood flooring from moisture and it will also help to reduce noise. There are several different types of underlayment available, so you should choose one that is appropriate for your needs. Once you have chosen an underlayment, you can begin to install it. The underlayment should be installed according to the manufacturer's instructions.
Step 3: Install the Moisture Barrier
Once the underlayment is installed, you can begin to install the moisture barrier. The moisture barrier will help to protect the engineered wood flooring from moisture that may come up from the subfloor. There are several different types of moisture barriers available, so you should choose one that is appropriate for your needs. Once you have chosen a moisture barrier, you can begin to install it. The moisture barrier should be installed according to the manufacturer's instructions.
Step 4: Install the Engineered Wood Flooring
Now you can begin to install the engineered wood flooring. The engineered wood flooring should be installed according to the manufacturer's instructions. Most engineered wood flooring is installed using a click-lock system. This system makes it easy to install the flooring without the need for nails or glue. Once you have installed the first row of flooring, you can continue to install the remaining rows. The last row of flooring may need to be cut to fit. Once the flooring is installed, you can trim the edges and install the baseboards.
Step 5: Finishing Touches
The final step is to add the finishing touches. This may include adding a stain or sealer to the flooring. You may also want to install a rug or carpet to help protect the flooring. Once the finishing touches are complete, you can enjoy your new engineered wood flooring.

How To Fit Engineered Wood Flooring Uk Manufacturer

How To Install Click Lock Engineered Hardwood Flooring

How To Install An Engineered Hardwood Floor

How To Install Click Lock Engineered Hardwood Flooring

Installing Engineered Hardwood On Concrete Twenty Oak

How To Install Click Lock Engineered Hardwood Flooring

How To Install Click Lock Engineered Hardwood Flooring

How To Lay Engineered Timber Floor Guide Fantastic Handyman Au

How To Fit Engineered Wood Flooring Uk Manufacturer

Engineered Wood Floor Laying Flooring Installation Method
See Also


