How To Install Wood Laminate Floors
Laminate flooring is a great way to add the look of wood to your home without the high cost of real hardwood. It is also a relatively easy project to install yourself, even if you have no prior experience. Here are the steps on how to install wood laminate floors:
1. Prepare the subfloor
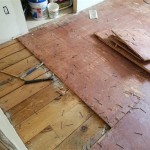
The first step is to prepare the subfloor. This means removing any old flooring, leveling the floor, and making sure it is clean and dry. If the subfloor is not level, you will need to use a self-leveling compound to smooth it out. Once the subfloor is prepared, you can begin installing the laminate flooring.
2. Install the underlayment
The next step is to install the underlayment. The underlayment is a thin layer of material that goes between the subfloor and the laminate flooring. It helps to protect the laminate flooring from moisture and provides a cushion that makes it more comfortable to walk on. There are different types of underlayment available, so be sure to choose one that is appropriate for your needs.
3. Install the first row of laminate flooring
Once the underlayment is installed, you can begin installing the first row of laminate flooring. Start by measuring the length of the wall and cutting the first plank to fit. Then, place the plank in place and tap it into the plank next to it. Continue installing the first row until it is complete.
4. Install the remaining rows of laminate flooring
Once the first row is installed, you can begin installing the remaining rows of laminate flooring. Start by staggering the joints between the planks. This will help to create a stronger floor and prevent the planks from buckling. Continue installing the laminate flooring until it is complete.
5. Trim the edges
Once the laminate flooring is installed, you will need to trim the edges. This can be done with a utility knife or a laminate flooring cutter. Be sure to use a sharp blade and to score the laminate flooring before cutting it. This will help to prevent the laminate flooring from chipping or breaking.
6. Install the moldings
The final step is to install the moldings. Moldings are used to cover the edges of the laminate flooring and to give it a finished look. There are different types of moldings available, so be sure to choose ones that match the style of your home.
Tips for installing wood laminate floors
Here are a few tips for installing wood laminate floors:
- Be sure to read the manufacturer's instructions carefully before beginning the installation.
- Use a level to make sure the subfloor is level before installing the laminate flooring.
- Stagger the joints between the planks to create a stronger floor.
- Use a sharp blade to trim the edges of the laminate flooring.
- Install the moldings to give the floor a finished look.

How To Install Laminate Flooring For Beginners

Installing Laminate Flooring For The First Time Home Renovation

Our Step By Guide For Laying Laminate Flooring

Installing Laminate Flooring For Beginners Full Diy Guide

Laminate Floor Installation For Beginners 9 Clever Tips

Guide To Installing Laminate Flooring Diy Family Handyman

How To Install Hardwood Flooring For Beginners

Laminate Flooring For Your Toronto Home Learn What To Expect The Reno Super

Installing Laminate Flooring For The First Time Crafted Work

Step By Guide On How To Install Hybrid Flooring Parrys


