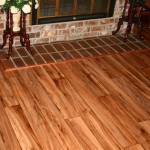
How to Fill Gaps in Wood Floors
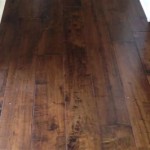
Gaps in wood floors are a common issue, often arising from seasonal changes in humidity. These gaps can detract from the aesthetic appeal of the floor and, in larger instances, may even pose a tripping hazard. Fortunately, several effective methods exist for filling these gaps, ranging from simple DIY solutions to more involved professional approaches.
Assessing the Gaps
Before selecting a filling method, it is crucial to assess the gaps. This assessment will inform the best course of action for a lasting repair. Consider the following:
*Gap Width:
Measure the width of the gaps. Narrow gaps can be addressed with wood filler, while wider gaps might require shims or spline installation. *Gap Length:
Note the length of the gaps. Longer gaps may indicate underlying structural issues that require professional attention. *Frequency:
How often do gaps appear? Frequent and recurring gaps suggest a need for humidity control in the environment. *Wood Type:
The type of wood flooring impacts material compatibility for fillers and other repair methods.Filling Small Gaps with Wood Filler
For gaps smaller than ¼ inch wide, wood filler is a practical solution. It is readily available, easy to apply, and comes in a variety of colors to match existing flooring.
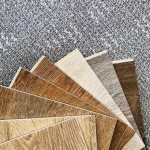
*Choose the Right Filler:
Select a wood filler that is compatible with the wood species of the flooring. *Prepare the Area:
Clean the gap thoroughly, removing dust and debris. *Apply the Filler:
Use a putty knife to apply the filler, pressing it firmly into the gap and smoothing the surface. *Sanding:
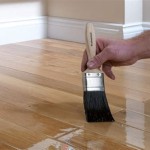
Once the filler dries, sand the area smooth and level with the surrounding floor. *Finishing:
Apply a finish coat to match the existing floor, if necessary.Filling Larger Gaps with Wood Shims
Gaps wider than ¼ inch often require more substantial filling. Wood shims offer a sturdy solution for these larger gaps.
*Select the Right Shims:
Choose shims of similar wood species and color to the flooring. *Prepare the Gaps:
Ensure the gaps are clean and free from debris. *Apply Wood Glue:
Apply wood glue to the sides of the shim. *Insert the Shim:
Gently tap the shim into the gap, ensuring it is flush with the floor surface. *Trim Excess:
Trim any excess shim material protruding above the floor surface using a utility knife or flush-cut saw. *Sanding and Finishing:
Sand the area smooth and blend with the surrounding floor, then apply a matching finish if needed.Using Wood Splines for Larger Gaps
Wood splines provide another method for addressing larger gaps. This technique involves cutting a groove along the edges of the gap and inserting a thin, flexible strip of wood.
*Cut the Grooves:
Use a spline-cutting tool to create grooves along both sides of the gap. *Select the Spline:
Choose a spline that matches the flooring's wood species and color. *Apply Wood Glue:
Apply wood glue to the grooves and the spline. *Insert the Spline:
Insert the spline into the grooves, ensuring a snug fit. *Trim and Sand:
Trim any excess spline material, then sand smooth and apply a finish as needed.Preventing Future Gaps
Addressing existing gaps is important, but preventing future gaps is equally crucial. These preventative measures can help maintain the integrity and appearance of wood flooring:
*Humidity Control:
Maintain consistent humidity levels in the home, ideally between 30% and 50%, using a humidifier or dehumidifier. *Regular Maintenance:
Sweep or vacuum regularly to prevent dirt and debris from accumulating in gaps. *Professional Inspection:
Consult a flooring professional to assess potential underlying issues that may contribute to gap formation.Roped In Filler: An alternative Choice
Roped-in filler is a specialized product designed for filling larger gaps and cracks in wood flooring. It offers a flexible and durable solution.
*Choose the Right Color:
Select a roped-in filler that closely matches the color of the wood flooring. *Prepare the Gap:
Clean the gap thoroughly, removing any dust or loose particles. *Apply the Filler:
Apply the roped-in filler to the gap, pressing it in firmly to ensure good adhesion. *Smooth the Surface:
Smooth the surface of the filler with a putty knife or your finger, ensuring it is level with the surrounding floor. *Let it Dry:
Allow the filler to dry completely according to the manufacturer's instructions.Professional Repair
For extensive or recurring gapping, consulting a professional flooring contractor is recommended. They can diagnose underlying issues and recommend appropriate repair solutions, potentially including board replacement or subfloor repair.

How To Fill Gaps In Pine Boards Expert Techniques For A Seamless Look Mr Sander

Should You Fill Gaps On A Timber Floor

Diy Guide Gap Filling In Wood Floors To Re Their Beauty

Three Methods To Fill Gaps In Wood Flooring And Beyond Blog

The Art Of Wood Floor Gap Filling Seamlessly Merging Elements For A Flawless Finish Sanding Floors

How To Fix Floating Floor Gaps The Easy Way

5 Tips To Keep Your Timber Floorboards In Perfect Nick

Can You Fill Gaps In Old Wood Floors 7 Amazing Solutions

How To Fill In Gaps Between Hardwood Flooring With Wood Filler

Gap Filling For Wooden Floors The Doctor