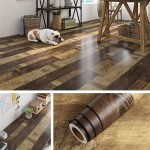
How To Varnish Wood Floor
Varnishing a wood floor is a great way to protect and beautify it. Varnish creates a hard, protective finish that is resistant to wear and tear, and it can also enhance the natural beauty of the wood. Varnishing a wood floor is a relatively simple process, but it does require some preparation and care. Here are the steps on how to varnish a wood floor:
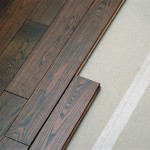
1. Prepare the floor.
The first step is to prepare the floor for varnishing. This involves cleaning the floor thoroughly to remove any dirt, dust, or debris. You can use a vacuum cleaner or a broom and dustpan to clean the floor. Once the floor is clean, you should sand it lightly to remove any rough spots or imperfections. You can use a hand sander or a power sander for this task. Once the floor is sanded, you should vacuum or sweep it again to remove any sanding dust.
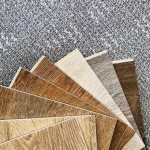
2. Apply the first coat of varnish.
Once the floor is prepared, you can begin applying the varnish. You should use a high-quality varnish that is specifically designed for wood floors. Apply the varnish in thin, even coats, using a brush or a roller. Be sure to follow the manufacturer's instructions for application. Once the first coat of varnish is applied, you should allow it to dry completely. This may take several hours or even overnight.
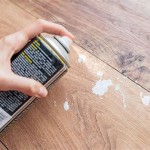
3. Sand between coats.
Once the first coat of varnish is dry, you should sand it lightly to remove any bumps or imperfections. You can use a hand sander or a power sander for this task. Once the floor is sanded, you should vacuum or sweep it again to remove any sanding dust.
4. Apply the second coat of varnish.
Once the floor is sanded, you can apply the second coat of varnish. Apply the varnish in thin, even coats, using a brush or a roller. Be sure to follow the manufacturer's instructions for application. Once the second coat of varnish is applied, you should allow it to dry completely. This may take several hours or even overnight.
5. Apply the third coat of varnish (optional).
If you want a more durable finish, you can apply a third coat of varnish. Apply the varnish in thin, even coats, using a brush or a roller. Be sure to follow the manufacturer's instructions for application. Once the third coat of varnish is applied, you should allow it to dry completely. This may take several hours or even overnight.
6. Cure the varnish.
Once the final coat of varnish is applied, you should allow it to cure for several days. This will allow the varnish to fully harden and develop its full protective properties. During this time, you should avoid walking on the floor or placing any furniture on it. Once the varnish is cured, your wood floor will be protected and beautiful for years to come.

How To Varnish A Wooden Floor Wood Finishes Direct

How To Varnish A Wooden Floor Ambience Hardwood Flooring

Diy Guide How To Sand And Varnish A Wooden Floor

How To Choose Right Varnish For Your Wooden Floor Esb Flooring

Wooden Flooring Dos And Don Ts Sadolin Uk

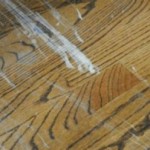
Wood Flooring Varnish Repair Finishes Direct

Choosing The Best A Guide To Wood Floor Varnish For Stunning Finish Mr Sander

Wood Flooring Varnish Repair Finishes Direct

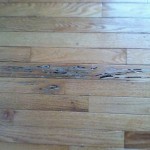
How To Sand Varnish Floorboards Part 2 Varnishing

London Homeowners Can Achieve A Perfect Finish On Solid Wood Flooring