Tile Floor Over Wood Subfloor
Installing tile flooring over a wood subfloor is a popular and practical choice for many homeowners. While it is generally possible to install tile over wood, there are a few important considerations and steps to take to ensure a successful installation.
1. Subfloor Preparation:
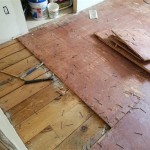
Before laying tile, it is crucial to prepare the wood subfloor to provide a stable and moisture-resistant base. This involves:
- Inspecting the subfloor for any damage, defects, or moisture issues.
- Repairing or replacing any damaged or compromised areas.
- Leveling the subfloor to ensure a flat and even surface for tile installation.
- Installing a moisture barrier, such as polyethylene sheeting, to prevent moisture penetration from the subfloor.
2. Underlayment:
An underlayment or backer board is typically installed over the moisture barrier to provide additional support and stability for the tile. It also serves to reduce noise and insulate the floor. Common choices for underlayment over wood subfloors include:
- Cement backer board
- Concrete backer board
- Plywood
3. Tile Selection:
Not all tiles are suitable for installation over wood subfloors. Choose tiles that are specifically designed for floor applications and are compatible with wood subfloors. Consider factors such as:
- Tile size and thickness
- Coefficient of friction (COF)
- Moisture absorption rate
4. Adhesive and Grout:
Use a thin-set mortar adhesive that is specifically formulated for tile over wood applications. The adhesive should have good bonding strength and flexibility to accommodate movement in the subfloor. Choose grout that matches the tile color and is resistant to moisture and staining.
5. Installation:
The tile installation process typically involves:
- Applying a layer of adhesive to the underlayment using a trowel.
- Positioning and pressing the tiles into the adhesive.
- Spacing the tiles with tile spacers to ensure even gaps.
- Allowing the adhesive to cure completely.
6. Grouting:
Once the adhesive has cured, the grout is applied to fill the gaps between the tiles. Use a grout float to spread the grout and remove excess. Allow the grout to set and haze, and then clean the tiles to remove any residual grout.
7. Sealing:
To protect the tile floor and enhance its durability, apply a grout sealer to the grout lines. This will prevent moisture penetration and staining. Use a sealer that is compatible with the grout and tile type.
Additional Considerations:
- Use flexible grout and adhesive if the subfloor is likely to experience movement or deflection.
- Consider a self-leveling compound to smooth out any unevenness in the subfloor before tiling.
- Allow ample time for the adhesive and grout to cure completely before subjecting the tile floor to heavy traffic.
- Regular maintenance and cleaning will help preserve the tile floor and extend its lifespan.

Blog Expert Advice How To Tile Onto Wood Plywood Or Chipboard

How To Prepare A Subfloor For Tile Installation The Home

Blog Expert Advice How To Tile Onto Wood Plywood Or Chipboard

Tile Subfloor Deflection Thickness Common Substrates

Blog Expert Advice How To Tile Onto Wood Plywood Or Chipboard

How To Prepare A Subfloor For Tile Installation The Home

How To Prepare Subfloor For Tile The Home Youtube

Tile Floor Underlayment Options Hometips

How To Tile Over A Wood Deck Building Advisor

Caution Natural Stone Tile Installed Over Wood Framing Floor Trends Installation


