How To Replace Wood Floor
Replacing a wood floor is a big job, but it's one that can be done by do-it-yourselfers with the right tools and materials. Here's a step-by-step guide to help you get the job done right.
Step 1: Remove the old flooring
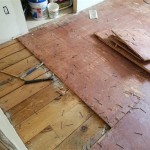
The first step is to remove the old flooring. This can be done using a pry bar or a flooring removal tool. Start by removing the baseboards around the perimeter of the room. Then, use the pry bar or flooring removal tool to carefully pry up the old flooring. Work in small sections, and be careful not to damage the subfloor.
Step 2: Prepare the subfloor
Once the old flooring has been removed, you need to prepare the subfloor for the new flooring. This involves leveling the subfloor and making sure it is smooth and free of debris. You can use a level to check for any uneven areas, and you can use a sander to smooth out any rough spots. If there are any holes or cracks in the subfloor, you will need to fill them in with a patching compound.
Step 3: Install the underlayment
The next step is to install the underlayment. Underlayment is a thin layer of material that is placed between the subfloor and the new flooring. It helps to reduce noise and vibration, and it can also help to insulate the floor. There are a variety of different types of underlayment available, so be sure to choose one that is appropriate for your needs.
Step 4: Install the new flooring
Now it's time to install the new flooring. Start by laying out the flooring in the room. Make sure that the planks are facing the same direction and that the joints are staggered. Once you have the flooring laid out, you can start to nail or staple it down. Use a flooring nailer or a staple gun to secure the planks to the subfloor. Be sure to follow the manufacturer's instructions for the flooring you are using.
Step 5: Trim the edges
Once the flooring is installed, you need to trim the edges. Use a jigsaw or a circular saw to cut the flooring to fit around the perimeter of the room. Be sure to leave a small gap between the flooring and the wall to allow for expansion and contraction.
Step 6: Install the baseboards
The final step is to install the baseboards. Baseboards cover the gap between the flooring and the wall, and they also help to protect the wall from damage. Use a miter saw to cut the baseboards to length, and then nail or staple them to the wall.
Step 7: Enjoy your new floor!
Congratulations! You have now successfully replaced your wood floor. Enjoy your new floor for many years to come.

How To Repair And Replace Wood Flooring Pro Tool Reviews

Removing Replacing A Damaged Hardwood Flooring Board

How To Repair Hardwood Floors The Craftsman Blog

How To Replace A Damaged Hardwood Floor Board Diy Family Handyman

How To Replace Damaged Hardwood Floor Planks Diy Advice

How To Replace Hardwood Floor With Pictures Wikihow

How To Remove A Single Piece Of Hardwood Flooring The Art Doing Stuff

Replacing A Hardwood Flooring Board

How To Replace A Damaged Hardwood Floor Board Diy Family Handyman

Replacing 2025 Hardwood Floors
See Also


