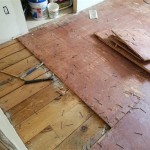
How To Layout Wood Flooring
Before you can start installing your new wood flooring, you need to lay it out. This will help you determine how much flooring you need and how to cut the pieces to fit. Here are the steps on how to layout wood flooring:
1. Measure the room. Determine the length and width of the room in feet. Multiply the length by the width to get the square footage of the room.
2. Calculate the number of boxes of flooring you need. Most boxes of wood flooring cover between 20 and 30 square feet. Divide the square footage of the room by the square footage covered by one box of flooring to get the number of boxes you need.
3. Determine the starting point. The starting point is the corner of the room that is most visible. If the room has a fireplace, the starting point is usually the corner opposite the fireplace.
4. Lay out the first row of flooring. Start by placing the first plank in the starting corner. Make sure that the tongue and groove edges are facing the wall. Use a spacer to ensure that there is a 1/4-inch gap between the flooring and the wall.
5. Continue laying the first row. Continue laying the planks in the first row, making sure that the tongue and groove edges are properly aligned. Use a tapping block and a hammer to tap the planks into place.
6. Measure and cut the last plank in the first row. Measure the distance between the last plank and the wall. Cut the plank to fit, making sure that there is a 1/4-inch gap between the plank and the wall.
7. Lay the second row of flooring. Start the second row by placing the first plank next to the last plank in the first row. Make sure that the tongue and groove edges are properly aligned. Use a tapping block and a hammer to tap the planks into place.
8. Continue laying the second row. Continue laying the planks in the second row, making sure that the tongue and groove edges are properly aligned. Use a tapping block and a hammer to tap the planks into place.
9. Measure and cut the last plank in the second row. Measure the distance between the last plank and the wall. Cut the plank to fit, making sure that there is a 1/4-inch gap between the plank and the wall.
10. Continue laying the flooring. Continue laying the flooring in the same manner until you reach the other side of the room.
11. Cut the planks to fit around obstacles. As you lay the flooring, you will encounter obstacles such as doorways and closets. Measure and cut the planks to fit around these obstacles.
12. Install the baseboards. Once the flooring is installed, you can install the baseboards. The baseboards will help to cover the gap between the flooring and the wall.

10 Ideal Wooden Floor Layout Patterns Every Homeowner Should Be Familiar With Arch2o Com

Design Guide Endless Possibilities Of Wooden Floor Layout Patterns Archdaily

How To Install Hardwood Flooring The Home

Which Direction To Lay Your Hardwood Flooring Riterug

Interesting Hardwood Layout Patterns Flooring America

Hardwood Flooring Layout And Positioning Urbanfloor Blog

Design Guide Endless Possibilities Of Wooden Floor Layout Patterns Archdaily

How To Install Hardwood Flooring Step By Forbes Home

Design Guide Endless Possibilities Of Wooden Floor Layout Patterns Archdaily

How To Install Hardwood Flooring For Beginners Youtube


