Wood Plank Floors From Plywood
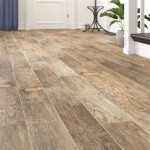
Plywood is a widely used material for subflooring, but it can also be a beautiful and affordable option for wood plank flooring. With a little creativity, you can use plywood to create a custom wood floor that is both stylish and durable.
Benefits of Plywood Flooring
There are several benefits to using plywood for wood plank flooring:
- Affordability: Plywood is a relatively inexpensive material, making it a budget-friendly option for wood flooring.
- Durability: Plywood is a strong and durable material that can withstand heavy foot traffic and wear.
- Versatility: Plywood can be used to create a variety of different wood plank flooring styles, from traditional to modern.
- Easy installation: Plywood is relatively easy to install, making it a good option for DIYers.
Steps to Make Wood Plank Floors From Plywood
To make wood plank floors from plywood, you will need the following materials:
- Plywood (1/2-inch or 3/4-inch thickness recommended)
- Table saw or circular saw
- Measuring tape
- Pencil
- Wood glue
- Brad nailer or flooring nailer
- Finish nails (1-1/2 to 2 inches long)
- Wood filler
- Sandpaper or sanding block
- Stain or paint (optional)
- Polyurethane or other floor finish
Once you have gathered your materials, you can follow these steps to make wood plank floors from plywood:
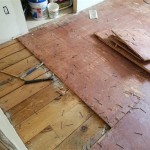
- Prepare the subfloor: Make sure the subfloor is level and smooth. If necessary, level the subfloor using a self-leveling compound.
- Cut the plywood: Cut the plywood into planks of the desired width. The most common plank width is between 3 and 5 inches.
- Install the plywood planks: Start by installing the first plank along one wall of the room. Use wood glue and brad nails to secure the plank to the subfloor. Continue installing the planks, staggering the joints as you go.
- Fill the nail holes: Once the planks are installed, fill the nail holes with wood filler. Allow the wood filler to dry completely.
- Sand the floor: Sand the floor to smooth out the surface. Start with a coarse sandpaper and gradually move to a finer sandpaper.
- Stain or paint the floor (optional): If desired, you can stain or paint the floor to achieve the desired look.
- Apply a finish: Apply a polyurethane or other floor finish to protect the floor from wear and tear.
Tips for Installing Plywood Plank Flooring
- Use a table saw or circular saw with a sharp blade to cut the plywood planks.
- Make sure the subfloor is level and smooth before installing the plywood planks.
- Stagger the joints of the plywood planks to create a more durable floor.
- Use wood glue and brad nails to secure the plywood planks to the subfloor.
- Fill the nail holes with wood filler and allow it to dry completely before sanding the floor.
- Apply a polyurethane or other floor finish to protect the floor from wear and tear.

How To Make Wide Plank Wood Flooring From Plywood The Lake And Land

Diy Rustic Wide Plank Plywood Flooring Our Project Ideas

Low Budget Diy Plywood Plank Floors Diydork Com

Plywood Floors All You Need To Know Bob Vila

Diy Plywood Floors Remodelando La Casa

Low Budget Diy Plywood Plank Floors Diydork Com

Diy Plywood Plank Floors Hometalk

Plywood Flooring How To Install Floors Alternative Hardwood Part 1

Wide Plank Plywood Flooring An Economical Solution Remodelando La Casa

Farmhouse Wide Plank Floor Made From Plywood Diy Picklee

