How to Install Wood Floor
Installing wood flooring can be a great way to improve the look and feel of your home. It can also increase the value of your property. However, installing wood flooring can be a complex and time-consuming process. If you're not careful, you could end up with a floor that is uneven, squeaky, or damaged. That's why it's important to follow the steps in this guide carefully to install your wood floor correctly.
Before you begin, you'll need to gather the following materials:
- Wood flooring
- Underlayment
- Nail gun
- Nails
- Saw
- Measuring tape
- Pencil
- Hammer
- Spacer blocks
- Caulk gun
- Caulk
Once you have all of your materials, you can begin the installation process.
Step 1: Prepare the subfloor
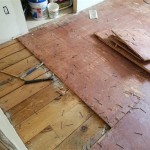
The first step is to prepare the subfloor. This involves removing any existing flooring, leveling the subfloor, and installing underlayment.
To remove existing flooring, you can use a pry bar or a hammer and chisel. Once the old flooring is removed, you need to level the subfloor. This can be done using a self-leveling compound or by shimming the subfloor with plywood.
Once the subfloor is level, you need to install underlayment. Underlayment is a thin layer of material that is placed between the subfloor and the wood flooring. Underlayment helps to reduce noise, provide cushioning, and protect the wood flooring from moisture.
Step 2: Install the wood flooring
Once the subfloor is prepared, you can begin installing the wood flooring. The first step is to determine the layout of the flooring. You can do this by measuring the room and drawing a plan on paper. Once you have a plan, you can start installing the flooring.
To install the flooring, you will need to use a nail gun. Start by nailing the first row of flooring along the longest wall in the room. Once the first row is installed, you can continue installing the rest of the flooring, row by row.
As you install the flooring, be sure to use spacer blocks to ensure that the flooring is evenly spaced. You should also stagger the joints between the rows of flooring. This will help to prevent the floor from buckling.
Step 3: Finish the installation
Once the flooring is installed, you need to finish the installation by caulking the seams between the flooring and the walls. You should also install baseboards around the perimeter of the room.
To caulk the seams, you will need to use a caulk gun. Apply a bead of caulk to the seam and then smooth it out with your finger. Once the caulk is dry, you can install the baseboards.
Installing wood flooring can be a complex and time-consuming process, but it is a rewarding one. By following the steps in this guide, you can install your wood floor correctly and enjoy it for years to come.

How To Install Hardwood Flooring For Beginners Youtube
:strip_icc()/101206836-29035ec5a7c34a12a4c00cd5101818d4.jpg?strip=all)
How To Install Hardwood Floors

How To Install Laminate Flooring For Beginners Youtube

How To Install Hardwood Flooring The Home

How To Install A Hardwood Floor Build This Weekend
:strip_icc()/101206837-1dd14e2eaebe404e9c0e3fd1494b7c77.jpg?strip=all)
How To Install Hardwood Floors

How To Install Oak Hardwood Floors Young House Love

How To Install Hardwood Flooring The Home
:strip_icc()/101206833-2e499ef612434b6b8ab6e5b62422a78f.jpg?strip=all)
How To Install Hardwood Floors

How To Install Hardwood Flooring For Beginners


